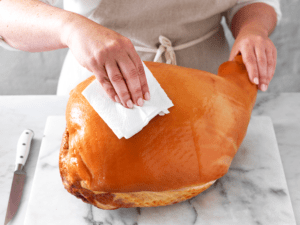
Step 1
Remove ham from the packaging. Place ham, rind-side up, on a clean work surface. Pat the rind dry with a paper towel.
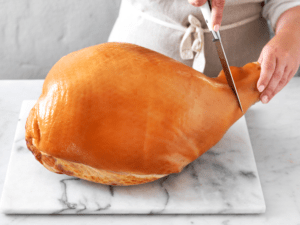
Step 2
Leg ham is covered with thick, rubbery skin called the rind. You need to remove the rind before carving or glazing.
To do this, carefully cut across and through the rind, starting 10cm from the hock end using a sharp knife. Do not cut through to the fat.
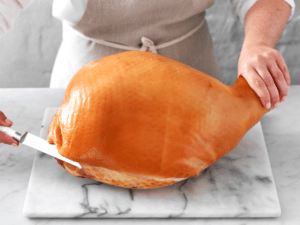
Step 3
Then, run the knife around the outer edge of the rind.
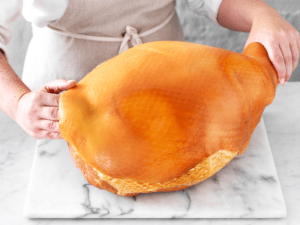
Step 4
Hold the hock with one hand, and starting at the opposite end of the hock, slide your fingers under the rind to separate it from the fat. Leave as much of the fat on the ham as you can.
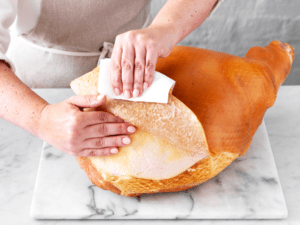
Step 5
Using a folded paper towel to hold the rind, gradually work your fingers along the ham between the fat and the rind while gently peeling the rind toward the hock end to remove the rind in one piece.
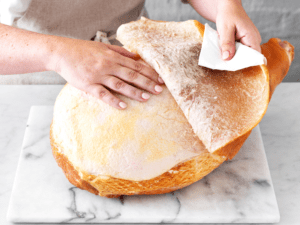
Step 6
Hold the hock with one hand, and starting at the opposite end of the hock, slide your fingers under the rind to separate it from the fat. Leave as much of the fat on the ham as you can.
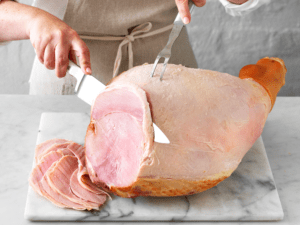
Step 7
To carve the ham, use a large sharp knife to slice downwards at a slight angle to carve it at the opposite end of the shank. Continue cutting as much ham as you need to serve.
If glazing the ham, follow the Steps for Glazing a Leg of Ham below.
Glazing Your Ham
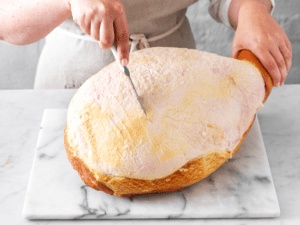
Step 1
After removing the ham rind, it’s time to score the ham fat before glazing.
Cut the fat crossways or lengthways using a small, sharp knife at 1 cm intervals. For ease, use a clean ruler as a guide when scoring. To form a honeycomb pattern, cut the fat crossways and lengthways to form diamonds. If you like, stud these diamonds with a whole clove.
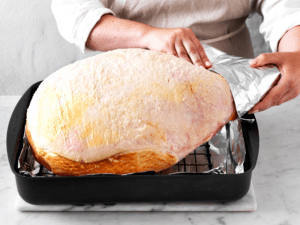
Step 2
Place the ham on a greased rack in a large baking pan lined with foil. (To save on washing up, place a large foil roasting pan onto a large baking tray). Wrap the hock end in a folded sheet of foil to prevent it from burning.
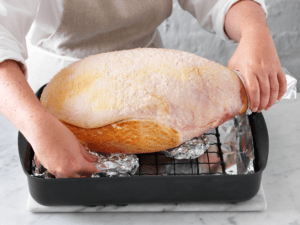
Step 3
Tuck a few balls of scrunched foil under the ham to level the top of the ham so the glaze doesn’t run off.
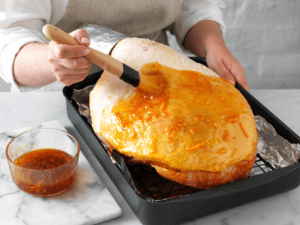
Step 4
Prepare your glaze. Brush the glaze over the ham fat to coat it evenly. Then, cook on the lowest shelf in a preheated oven at 180°C/160°C fan-forced, brushing every 20 minutes with remaining glaze for about 1 hour or until golden and caramelised. Remove from the oven. Remove the foil from the hock. Allow the ham to rest for at least 30 minutes before serving.
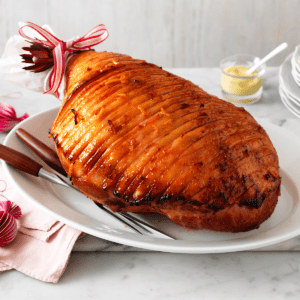
Step 5
For a festive way to serve your Christmas ham, wrap the hock end in a strip of folded baking paper and tie it with string or ribbon. Tuck in a few sprigs of fresh herbs, such as bay leaves or rosemary (or use an Australian native flower). Place the ham onto a serving platter. Serve with mustard.
Storing your ham
- Ham will keep longer on the bone, so only slice what you need.
- Keep your ham fresh in the fridge by covering it in a clean ham bag, pillowcase, or tea towel that has been soaked in a mixture of two parts water and one part white vinegar and wrung out. Repeat the soaking every three days or when it dries out.
- Leg ham, when stored as above, will keep perfectly in the fridge for up to two weeks.
How to Choose Your Christmas Ham:
Tips from Fleischmeister and master butcher, Horst Schurger:
- Look for a natural meaty texture: avoid the wet or rubbery.
- Choose a ham with a good smoky flavour. Ask to taste it.
- Look for smooth, even skin and even colouring. If the knuckle is sunken, it’s overcooked. If the rind is buckled or uneven, it’s a sign of dryness.
- Hams 10-12kg are most likely to have the best flavour and texture due to age of the pig.
- For the best results, opt for fresh Australian pork rather than hams made in Australia from frozen imported meat.
Everyone loves a juicy, succulent ham. But did you know the majority of ham and bacon sold in Australia is made from imported pork? To be sure you’re buying Australian ham and bacon, look for the distinctive Australian Pork logo or buy a bone-in ham.
